Where Your Logo Actually Goes on a Curved Fan Body — and Why It Ends Up on the Base
The brand guideline says the wordmark must never be reproduced smaller than a stated width, and must always sit horizontally with clear space around it. The fan is a cylinder eight centimetres across with a moulded parting line down the middle, a battery indicator on one face, a speed button on the other and a hinge at the bottom. Somewhere between those two documents, a compromise has to be reached — and the reason it so often ends up on the base is not laziness. It is the only surface on the product that is genuinely flat, genuinely large and genuinely empty.
This is what actually governs where a logo can go on a fan: how a pad print and a UV print each behave on a curve, which surface each format offers you, why the guard is tempting and usually wrong, and the marks that were already claiming your best flat area before the artwork arrived. It closes with the artwork checklist our production team works through before a mockup is issued.
The short version. A curve limits the usable width of a print, not just its size — the tighter the radius, the narrower the band you can print without distortion. Pad printing tolerates gentle compound curves; UV printing wants something close to flat. The base and the handle are the honest positions on most fan formats. Settle where the rating and safety marks go at the same time, because they want the same flat area your logo does.
What a curved surface does to a print
Pad printing works by picking ink out of an etched plate with a soft silicone pad and rolling it onto the product. Because the pad deforms, it will follow a gentle curve and even a shallow compound curve — which is why it remains the workhorse for solid, one and two-colour logos on moulded bodies. The limit is not whether it can touch the surface but what happens to the image as the pad rolls. Towards the edges of the contact area the artwork stretches, so a long horizontal wordmark wrapped around a small-diameter body will come out subtly wider at its ends than in its middle.
UV printing is the opposite temperament. It lays ink from a fixed print head, so it gives you full-colour artwork, gradients and photographic detail — but it needs the surface to sit within a narrow focal tolerance. A near-flat panel is ideal; a gently domed one is workable; a small-radius cylinder needs a rotary jig, and there is always a point where a pass begins and ends. Put a solid block of colour across that point and you may see it.
Two surface conditions catch people out regardless of method. The first is the mould parting line — the faint ridge where the two halves of the tool met. A print crossing it will show a step, and no amount of artwork adjustment fixes that. The second is soft-touch or heavily textured finishes, which look premium and need extra adhesion preparation or the print scuffs off in a bag. Both are visible on a physical sample and invisible on a rendering.
Print position by fan format
Format decides geometry, and geometry decides branding. This is how our team reads a fan body before a mockup is drawn.
| Format | Best surface | Method that suits it | The catch |
|---|---|---|---|
| Handheld / folding | The handle face, then the base | Pad print; UV where the handle face is flat enough | The hand covers the handle in use — good for shelf presence, weaker for photographs |
| Desk / standing | The front of the base, which faces the user all day | UV print — usually the flattest panel on the product | Shares space with the control panel and the charging port |
| Neck / hands-free | The outer face of each arm | Pad print, small and simple | Two narrow curved bands. Icons and short marks work; long wordmarks do not |
| Clip / multi-position | The body side opposite the clip | Pad print | The clip mechanism eats one whole face and the orientation changes with mounting |
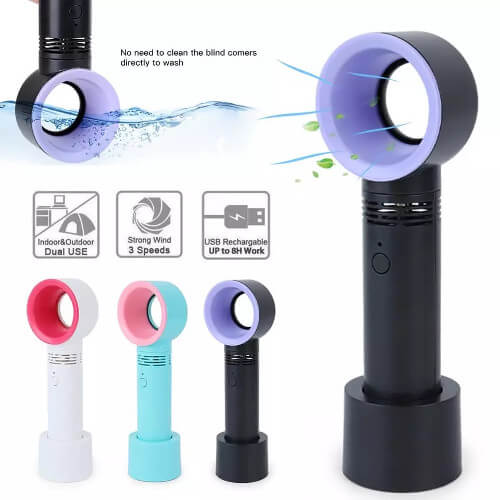
| Bladeless | The base column, below the ring | Pad print or UV, depending on the column profile | The ring is the striking part and the worst printing surface on the product |
| LED display | The handle for a printed mark; the display for the message | Pad print, plus an uploaded image for the display | The display is a screen, not a print — different artwork, different brief |
The guard is tempting and usually wrong
The front guard is the largest face on a bladed fan and the first place a designer wants to put a logo. Occasionally it works — on a large-diameter desk fan with a solid grille band, a wrapped UV print across the guard looks excellent. More often it disappoints, for three reasons that are easy to overlook on screen.
First, most guards are mostly holes. Artwork printed onto a mesh loses whatever falls between the struts, so fine type and thin strokes break up. Second, the guard is the part of the fan that gets knocked, wiped, stacked and gripped, so it is the worst place for print durability. Third, the guard rotates or clips off on many folding models, which means the logo orientation is not fixed — a wordmark can end up sideways in the very photograph the campaign was built around.
The blade myth. Every few months somebody asks for the logo on the blades. On a stationary fan it is barely legible because the blades are pitched away from the viewer; on a running fan it is a blur. What people are remembering is an LED message fan, where an array of lights along a spinning arm draws text in mid-air through persistence of vision. That is a display, not a print — the artwork is an uploaded image file, so it belongs in a separate line of the brief with its own resolution and colour constraints.
The marks that were already on your fan
Here is the part that surprises marketing teams and never surprises production. A rechargeable fan arrives with information already committed to its body: the model number, the rated input, the battery type and capacity, the manufacturer or importer identification, and any recycling or disposal symbols that apply. On a small product there is exactly one surface big enough and flat enough to hold that block of small type legibly, and it is the base — the same surface your logo wants.
If a product in the pack is a regulated electrical item under Malaysia’s Energy Commission list — most commonly a mains adapter rather than the fan itself — it will also carry the ST-SIRIM label, and that label needs a defined, undamaged area to sit on. Deciding this at mockup stage costs nothing. Discovering it after tooling costs a revision cycle, which is precisely the delay that pushes an order past its event date. The compliance side of that question is set out in the shipping paperwork a battery-powered gift needs.
The practical rule we apply: ask for a marked-up photograph of the actual body showing every existing mark before artwork is drawn, then place the logo in what is left. It reverses the usual order and it saves a round every time.
Colour on a coloured body
A brand colour printed onto white ABS and the same colour printed onto navy or dark grey are not the same colour. Pad-printing inks are not fully opaque, so a mid-tone printed directly onto a dark body shifts and dulls. The fix is a white underbase printed first, which means a second pass, a second setup and tighter registration — entirely doable, but it needs to be in the brief rather than discovered at proofing.
Two alternatives are often better. Choose a body colour that lets a single-colour print sit cleanly — white or a light neutral is the most forgiving canvas. Or reverse the logic and match the body colour to the brand, then print in white or a metallic. On a fan that is going to be photographed at an event, a well-chosen body colour does more brand work than a large logo on the wrong surface. If you are weighing that against battery and format decisions, the battery claims worth checking before artwork should be settled first, since capacity affects body size and therefore print area.
Artwork prep checklist for a fan body
- Send vector artwork with fonts outlined, and a separate one-colour version. The one-colour version is what will actually be used on curved surfaces.
- State a minimum legible width in millimetres, not a percentage. Curvature limits width first, so this is the constraint that decides the position.
- Give the position from a fixed datum — “centred, 8 mm above the base edge” — not “centred on the body”, which means different things on different mouldings.
- Nominate the body colour before proofing, and ask whether a white underbase is needed for your brand colour on that colour.
- Ask where the existing marks sit and get them shown on the mockup so nothing collides.
- Brief packaging separately. A gift box is flat, takes full-colour offset or a printed sticker, and is where detailed artwork that will not survive a curve should go.
- Approve on a photograph of the real body, not a generic template. Then hold the approval date — production runs 21–45 days from it, plus roughly 15 days shipping.
One last cross-check before sign-off: run the shortlisted model through the noise test we run on every fan sample. It is common to fall in love with a body shape for its print area and then discover it is the loudest fan on the shortlist. Our customised portable fan KL range lists the practical branding area alongside the model so both checks can happen in one pass.
Questions we get asked
Can you print full colour on a fan?
Yes, by UV printing, where the surface is flat or gently curved enough for the print head. On tightly curved bodies a solid one or two-colour pad print reproduces more reliably. Full-colour artwork that will not sit on the body is usually better placed on the packaging.
Why is my logo smaller than on the mockup I imagined?
Because a curved surface limits printable width before it limits height. A wide horizontal wordmark has to shrink until it fits inside the band that prints without distortion. Stacking the logo into two lines, or using a compact version of the mark, usually recovers the visual size.
Can we have the logo on the blades?
It is possible but rarely worthwhile — the blades are pitched away from the viewer when still and invisible when spinning. If the goal is a logo that appears in the air, that is an LED display model and the artwork is an uploaded image rather than a print.
Do you charge for the mockup?
No. Send the artwork and the model you are considering and you will receive a free digital mockup, usually within one business day, with the branding area and position shown on the actual body.
What is the minimum order per design?
From 300 pcs. Production is 21–45 days after artwork approval depending on quantity and branding method, plus roughly 15 days shipping; express is 10 working days on limited models and quantities. Aquaholic Gifts has been a Singapore-based corporate gifting specialist since 2003 and now supplies Malaysia nationwide.
Send the artwork — we will show you exactly where it fits
Give us your logo file and the fan format you have in mind, and you will get a free digital mockup on the real body within one business day, with the print area, method and position marked and the existing product marks accounted for. If you are still deciding, this is where to buy USB fan in Malaysia or KL with the branding worked out before you commit. From 300 pcs, delivered nationwide, SST invoice provided and ePerolehan-ready for government buyers.
WhatsApp +60 10 717 5924 Send your brief
Aquaholic Gifts Malaysia · AS80, Jalan Hang Tuah 4, Taman Salak Selatan, 57100 Kuala Lumpur