Printed Flat, Then Sewn: What Cut-and-Sew Panel Production Does to Your Singlet Artwork
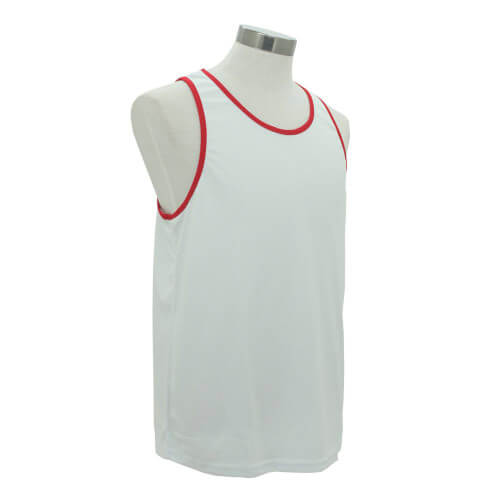
A team design came in with a horizontal band running right around the body. On the first sample the band met at the left side seam almost perfectly and missed by about six millimetres on the right. The instinct was to blame the sewing. The sewing was not the problem. The band had been drawn as though the singlet were a cylinder, and it is not one. It is flat panels, printed before anybody sewed anything.
That is the thing most buyers do not know about singlets: they are one of the few garments routinely made by printing the cloth first and cutting the garment out of it. Everything about the artwork changes as a result, and so does your calendar.
This article covers the production sequence, what a seam allowance takes out of your design, how to draw something that crosses a side seam, what the binding removes, how names and numbers behave inside a print file, and why the artwork lock date sits weeks earlier than buyers expect. If you are specifying sublimation singlet custom KL teams order for the first time, read this before the artboard is opened.
Two production orders, and the singlet uses the rarer one
Most branded apparel is made in this order: the garment is manufactured, stock is held, an order arrives, and decoration is applied to the finished garment. The blank exists before your logo does, and if the artwork changes only the decoration step repeats.
A cut-and-sew singlet runs the other way. Your artwork is laid out as flat panel shapes, printed onto roll fabric, cut along the pattern lines and only then assembled. There is no blank: the garment does not exist until your design does, and the design sits inside the cloth rather than on top of it.
| Decorate after make | Cut and sew from printed panels | |
|---|---|---|
| What exists first | A finished blank garment | Your artwork |
| Where the design sits | On the surface, within a press area | Across whole panels, edge to edge |
| Effect of an artwork change | Re-do the decoration step | Re-print the fabric and re-cut the panels |
| Design across a seam | Not possible — the seam already exists | Possible, within a tolerance |
| Artwork deadline | Late in the schedule | At the very front of the schedule |
| Typical singlets | Plain cotton and stock sports bodies with a chest mark | Team, basketball, marathon and full-print event singlets |
Neither route is better. They are different production models with different rules; the mistake is briefing one as though it were the other. Everything below applies to the second column.
The deadline that moves, and what it does to your calendar
On a decorate-after-make order, artwork approval sits near the middle of the schedule. On cut-and-sew it is the gate that starts everything, because nothing begins until the print file is final. Our window is 20 to 30 working days after artwork approval plus around 15 days shipping — and here, “after artwork approval” is doing a great deal of work in that sentence.
Here is the same date counted backwards, the way we build it with clients.
| Working backwards from | What has to be true | Why |
|---|---|---|
| Handover day | Kit distributed | The fixed date everything else answers to |
| Minus ~15 days | Goods shipped from production | Nationwide delivery; East Malaysia legs run longer |
| Minus 21–45 days | Artwork approved and locked | Printing, cutting and sewing all sit inside this window |
| Minus 3–5 working days | Mockup reviewed and revisions returned | Every revision restarts the print file, not just a press setting |
| Minus 2–3 working days | Roster of names and numbers final | Names sit inside the panel artwork, so a late change is a re-print |
| Minus 1 week or more | Style, armhole and neckline decided | The panel shapes come from the pattern; artwork is drawn onto them |
The single most expensive habit on a cut-and-sew order
Treating the name list as something that can follow the artwork.
On a garment decorated after making, a late roster change costs one more pass on one garment. On cut-and-sew it means re-printing that person’s panels, re-cutting and re-sewing an entire singlet. Collect the roster before the mockup goes out, not after.
The centimetre that disappears at every seam
A panel is not the shape of the finished piece you see. Each edge that will be joined carries a seam allowance, commonly around 10 millimetres, folded inside and stitched. It exists on the printed panel and is invisible on the finished singlet.
That has two consequences worth designing around.
- Artwork must run past the pattern line, not stop at it. Extend it beyond every edge by at least the seam allowance so no unprinted fabric appears if the cut shifts a millimetre or two.
- Keep anything that must not be cut inside a safe zone. We ask for a logo, sponsor mark or wordmark to sit at least 15 millimetres clear of every seam, hem and binding line.
Settle the tolerance before production rather than after. Fabric moves — it is printed on a roll, relaxed, cut and fed through a machine by a person. Around three millimetres of match at a joined seam is achievable and reasonable to specify. A design that only works at zero tolerance will produce complaints on part of the run.
Drawing something that crosses the side seam
This is the capability that makes cut-and-sew worth using and the one that generates the disappointment. Some elements cross a seam gracefully; some do not.
| Design element crossing a side seam | How it behaves | Verdict |
|---|---|---|
| Solid block of one colour | Any small offset is invisible; the colour simply continues | Safe — use freely |
| Gradient or texture | A few millimetres of offset reads as part of the effect | Safe |
| Thick horizontal band, 40 mm or more | A 3 mm step is barely visible against the band depth | Usually fine |
| Thin horizontal stripe, under 15 mm | A 3 mm step is a fifth of the stripe — clearly visible | Risky — thicken it or break it |
| Repeating fine pattern | Any offset breaks the repeat and reads as a fault | Avoid across the seam |
| Text or a logo straddling the seam | Letters split and step; also lands in a high-flex area | Never do this |
When something must cross and falls into the risky rows, design the break in deliberately: interrupt the stripe with a vertical panel at the side seam, or taper it as it approaches. A designed break looks intentional at any tolerance. An accidental step looks like a defect, even at two millimetres.
The same applies at the shoulder, where front and back panels meet, and it interacts with the cut: a racerback puts the shoulder join somewhere completely different from a straight back. Settle the neckline drop you settle before the artboard opens and the back style first; the artwork follows the pattern, not the other way round.
The binding takes a slice of your artwork too
Every armhole and neckline is covered by a binding strip, typically four to six millimetres wide on the face. That strip sits on top of printed panel, so whatever you drew in that band disappears under it.
With the seam allowance, the rule is simple: nothing that matters within about 15 millimetres of an armhole or neckline edge. A sponsor mark drawn to the armhole comes back half covered, and no amount of careful sewing recovers it. Whether the binding is self-fabric or a contrast strip is a decision to make alongside the artwork, covered under where the binding eats into the printed area.
Armhole depth matters here too, because it decides how much panel you have. A deep basketball cut removes a large part of the upper side, so a design drawn for a shallow event body loses its edges when the same file goes onto a deeper cut. Confirm how deep the armhole should be cut for the sport before the artwork is drawn, not afterwards.
Names and numbers when they live inside the print file
On a basketball or team singlet, the roster is not a decoration applied at the end. Each player’s panel is an individual print, which changes how the data has to arrive and what a change costs.
- Send the roster as one spreadsheet: name as it should appear, number, size, and style if the order mixes bodies. One file, one version, one owner.
- Decide capitalisation, spacing and how long names are handled before the file is sent. Condensing a long name is a design decision, and it looks wrong made at the machine.
- Scale the number with the garment. A number sized for XXL looks enormous on XS, so we set number height per size band.
- Keep the back number clear of the neckline binding and of a racerback opening — a racerback removes exactly the area a large number wants.
- Treat the roster as locked at artwork approval. After that, a change means re-printing and re-cutting that person’s panels.
One habit saves trouble on team orders: ask for a proof sheet of the whole roster rather than a single mockup. Reading every name and number in one image catches spelling errors, duplicated numbers and over-long names far faster than approving one representative garment.
Why panel printing starts from white cloth
One property of panel printing surprises buyers, and it is a workflow fact rather than a styling choice: the process puts colour into white fabric. It cannot put a light colour onto fabric that is already dark, because nothing in the process covers what is underneath.
That is why a black cut-and-sew singlet is printed black rather than woven black, and why the whole panel — including what you think of as background — is part of your artwork file. It is also why supplying pre-dyed coloured bodies moves the order back into decorate-after-make, with different limits on how far a design can travel. Which route you are on is the first conversation, not the last.
What a factory needs before it can cut
| Item | What good looks like |
|---|---|
| Artwork format | Vector (AI, EPS or PDF) with fonts outlined; raster elements at high resolution at final print size |
| Bleed | Design extended at least 10 mm past every pattern edge |
| Safe zone | Critical elements 15 mm clear of seams, hems, armholes and neckline |
| Colour references | Named colour references rather than “the same blue as our website” |
| Style and pattern | Body style, armhole drop, neckline drop and back style confirmed |
| Roster | One spreadsheet: name, number, size, style |
| Size breakdown | Quantity per size, and per style if the order mixes bodies |
| Match tolerance | Agreed in writing — around 3 mm at joined seams is realistic |
When all eight arrive together, a cut-and-sew order is predictable. When they arrive one at a time over three weeks, the production clock has not started and the handover date quietly moves.
Questions buyers ask about custom singlets (singlet) (singlet) (singlet)
Can our design continue across the side seam of a singlet?
Yes, within a tolerance. Solid colours, gradients and thick bands cross without a visible step. Thin stripes, fine repeats and text should not — design a deliberate break at the seam instead, which reads as intentional at any tolerance.
Why does a cut-and-sew singlet need the artwork so much earlier?
Because the fabric is printed before the garment is cut. On a garment decorated after making, a change repeats one step. Here it means re-printing cloth, re-cutting panels and re-sewing the garment, so the artwork lock date sits at the very front of the schedule.
How close to the armhole can our sponsor logo sit?
Keep it at least 15 millimetres from the finished edge. The binding covers four to six millimetres of the face, and the seam allowance takes more, so anything drawn to the edge comes back partly hidden.
Can we add two more players after the artwork is approved?
It is possible, but it means a new print, cut and sew for those panels rather than a quick addition, so it may not fit the original schedule. Tell us at approval if the roster might grow and we will plan for it.
What is the minimum order for custom singlets in Malaysia, and how long does a full-print order take?
Our singlet MOQ is from 200 pcs. Production runs 20 to 30 working days from the moment the artwork is approved, plus around 15 days shipping nationwide, with a 10 working day express route on limited styles and quantities. Get the artwork locked early and the rest of the schedule behaves.
Send the artwork early and we will tell you what the seams will do to it
Send your design, size breakdown and roster and we will return a free digital mockup with the seam lines, binding lines and safe zones drawn on, so you can see what survives the cut before anything is printed. Browse basketball singlet printing Malaysia and marathon singlet Malaysia kits to see how far a full-panel design can travel.
A Singapore-based corporate gifting specialist since 2003, now serving Malaysia from AS80, Jalan Hang Tuah 4, Taman Salak Selatan, 57100 Kuala Lumpur. WhatsApp us on +60 10 717 5924 or use the contact page. SST-compliant invoicing and ePerolehan-ready documentation on request.