Four Panels and Two Points: Where a Logo Actually Reads on a Rugby Ball
Colour is rarely what goes wrong on a rugby ball approval. Geometry is. The artwork arrives as a flat rectangle, gets dropped onto a flat drawing of a ball, and is signed off in a meeting lasting four minutes. Then the sample lands on the table, somebody stands it on end for the photo, and the logo that looked perfectly centred is running downhill into a seam.
This article is the placement map nobody draws before approving artwork — written for the marketing executive, club secretary or sponsorship manager in Kuala Lumpur who has been asked to put a brand on an oval object and has, quite reasonably, never had to think about prolate spheroids before. We will work through what the four panels are, how big the usable canvas on each really is in millimetres, which panel the camera sees, which one the hand covers, and why the pointed ends are the most expensive real estate you will never use.
A rugby ball is not a sphere, and that changes every decision after it
On a round ball, curvature is identical in every direction and the object has no orientation to speak of. A rugby ball is a prolate spheroid: a shape stretched along one axis, with two curvature values instead of one. Along the long axis it curves gently. Around the middle it curves hard. And it has a definite up, a definite along, and two ends that come to a point.
World Rugby’s Law 2 fixes the senior ball’s proportions tightly: 280–300 mm long, 740–770 mm around the long way (tip over tip), 580–620 mm around the middle, and 410–460 g in weight. Those four numbers are the entire brief for your artwork, because between them they tell you exactly how much flat area you have before the surface starts turning away from the eye. Promotional-grade balls are made to broadly the same silhouette even when they are not built for match play, which is why the placement logic below holds whether you are ordering display pieces or playable stock from our range of custom rugby balls in Malaysia.
The four panels: what they are, and why they are lenses, not rectangles
A rugby ball is built from four panels stitched together along four seams that run the length of the ball and converge at the two tips. Think of an orange cut into quarters. Each panel is a lens — a leaf shape at its widest across the middle of the ball, tapering to nothing at both ends.
That has a consequence most artwork briefs miss. Take the size 5 numbers and divide them. The girth of 580–620 mm is shared by four panels, so each is roughly 145–155 mm wide at its fattest point. The end-to-end circumference of 740–770 mm covers both faces, so one seam runs about 370–385 mm tip to tip. Your canvas per panel is a pointed almond roughly 380 mm tall and 150 mm wide — and almost half of that sits in the tapering ends, where the surface turns away and the seams close in.
The one-third rule our production team applies before anything else
Ignore the outer sixth of the panel at each end, and the 10 mm nearest each seam. What is left is the honest reading area: roughly the middle third of the ball’s length by about two-thirds of the panel’s width. Everything outside it will still be branded and will still look fine on the flat mockup — it simply will not be legible from any angle a person naturally holds or photographs the ball at. Exact areas are confirmed on your digital mockup, but this is the shape we sketch first.
Which panel does the camera actually see?
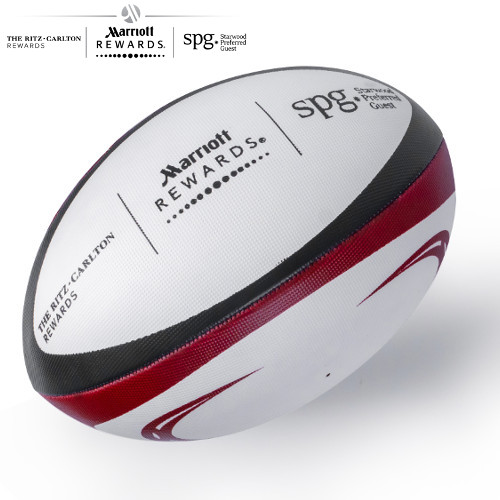
Hold a rugby ball side-on at arm’s length and count what you can read. You are looking at exactly one panel face-on, two thin slivers of the panels either side of it, and one panel you cannot see at all. That is the arithmetic that decides how many panels you brand.
Brand one panel and the ball has a one-in-four chance of showing your logo to whoever picks it up. Brand two opposite panels and it becomes one-in-two, and the ball reads correctly however it is rolled onto a shelf. Brand all four and the logo is unmissable from every angle — the right answer for display balls, trophy-cabinet pieces and anything that will sit on a sponsor’s table for a season. Brand two adjacent panels instead of the opposite pair, a mistake invisible on a flat mockup, and you have built a ball with a blank side.
End-on, side-on: the two views your ball will really be seen in
Here is the split that catches almost everybody. A rugby ball is photographed end-on and used side-on. The hero shot — event poster, club social post, internal newsletter — almost always stands the ball upright on a tee, tip pointing at the ceiling. That view foreshortens the ball dramatically: the long axis compresses, the tips dominate, and the middle third of the panel is the only part still facing you squarely.
The moment somebody picks the ball up it flips ninety degrees. The long axis goes horizontal, the panel is presented at full length, and two hands sit across the middle of it — covering, in most grips, precisely the area you had decided was your safest zone. Neither view is wrong. They want different things, and the artwork has to serve both.
| Placement zone | Reads well when… | Disappears when… | Best used for |
|---|---|---|---|
| Panel centre (middle third, long axis horizontal) | Ball is on a shelf, in a cabinet or in a flat-lay photo | Somebody is holding it — hands land here | The primary logo |
| Upper third (between centre and the top tip) | Ball is stood upright for the hero shot | Ball is lying flat and the zone rolls away | Event name, year, tournament mark |
| Tips (outer sixth at each end) | Never, for anything you need read | Every angle — four seams converge here | Block colour or a repeating pattern |
| All four panels (full wrap) | Every angle, every photo, every roll | — | Display balls, sponsor gifts, trophy pieces |
The seams are the only straight lines on the ball — use them or avoid them
Four seams run the length of the ball. They are raised, stitched, and the one place on the surface where the material is neither flat nor continuous. A logo crossing a seam does three unhelpful things at once: it breaks along the ridge, sits at a slightly different height either side, and draws the eye to the stitching instead of the mark.
The practical answer is a clearance margin. Keep anything you need read — wordmarks, small type, thin rules, registration symbols — well clear of the stitch line, and let only block colour or a deliberately abstract pattern run up to it. If a design genuinely has to span the whole ball, design it for the seams so the break is intentional rather than accidental. Seams also give you a free alignment guide: a logo centred between two seams is centred on the panel, which is far easier to check on a sample than to eyeball on a flat file.
The near-miss worth knowing about. A wordmark scaled to look impressive on the flat mockup fills the panel and looks confident. Wrapped onto the actual ball, the first and last letters have already begun to rotate out of view, and the mark reads as a shortened, unfamiliar word from every angle except dead-centre. Shrinking a logo by a fifth feels like a compromise on screen; on an oval it is the difference between a brand people recognise and one they squint at.
What curvature does to your artwork before anyone prints anything
Flat artwork applied to a double-curved surface has to give somewhere, and on a rugby ball the give is not uniform. Because the ball curves hard around the girth and gently along its length, a circle placed on a panel finishes slightly taller than it is wide. Over a small mark in the safe zone this is imperceptible; over a mark spanning most of a panel it is why a perfect circle in your brand guidelines can come back looking faintly like an egg.
Three consequences follow. Circular logos and roundels are the most sensitive to placement drift, so keep them small and central. Horizontal wordmarks travel better across the girth than vertical ones travel along the length. And fine outlines fare worse than solid shapes, since distortion in a hairline rule is proportionally enormous — if your identity depends on one, thicken it for this surface and say so in the brief. If the design brief also involves a playable ball rather than a display piece, read what the grip pimples do in a downpour before you commit to heavy coverage across the panels.
The pre-approval checklist for rugby ball artwork
Run this before you sign off the mockup, not after. Ten minutes, and it is the difference between a ball people photograph and a ball people apologise for.
- Count your panels. Decide on one, two opposite, or all four — and write it in the brief as “opposite” or “adjacent” so there is no ambiguity.
- Print the mockup and hold it up. Not on screen — paper, at arm’s length, at actual size.
- Check the seam clearance. Anything with a letterform in it must sit clear of the stitch lines.
- Check the tips. Nothing legible in the outer sixth at either end.
- Do the end-on test. Ask for the ball shown upright as well as flat. If the logo vanishes in the upright view, move it up the panel.
- Do the hand test. Cover the panel centre with two fingers. Still a brand visible? If not, add a secondary mark higher up.
- Check the smallest element. Whatever is smallest will fail first. Enlarge it or drop it.
- Confirm the size before the artwork. A layout drawn for a senior ball does not simply scale onto a mini — the panel proportions change, which is why choosing between size 5, size 4 and a mini size 3 belongs at the start of the process, not the end.
Ordering in Malaysia: what to send us and when
Send vector artwork with fonts converted to outlines, tell us the grade and size you have in mind, and say how many panels you want branded. We come back with a free digital mockup, usually within one business day, showing the ball upright and flat so you can run the checklist properly.
Minimum order is from 300 pcs. Production runs 21–45 days after artwork approval depending on quantity and finishing, plus around 15 days shipping; an express route of 10 working days exists for limited styles and quantities. Aquaholic Gifts has been a Singapore-based corporate gifting specialist since 2003 and now serves Malaysia from Kuala Lumpur, with SST invoicing and ePerolehan-ready documentation for government buyers. If your ball is tied to a tournament date, tell us that date first and we will work the calendar backwards from it — approving artwork late is the easiest way to lose the express option.
Rugby ball artwork questions we get asked
How many panels should I brand on a custom rugby ball?
For display balls, sponsor gifts and anything that will be photographed, brand all four — the ball then reads correctly from every angle. For a simpler look, brand two opposite panels rather than two adjacent ones, so the ball never presents a blank side. A single branded panel is fine only where the ball will be displayed in a fixed position.
Can a logo run across a seam on a rugby ball?
Block colour and abstract patterns can cross a seam without trouble. Letterforms and fine detail should not — the seam is raised and stitched, so a wordmark spanning it breaks visually. Keep anything you need read clear of the stitch line.
How big can my logo be on a size 5 rugby ball?
A senior panel is roughly 145–155 mm across at its widest and tapers to a point at both ends, so the legible area is far smaller than the panel outline suggests — think the middle third of the ball’s length. Your exact area is confirmed on the digital mockup.
Why does my logo look different on the ball than on the flat mockup?
Because the mockup is flat and the ball is doubly curved. It curves hard around the girth and gently along its length, so shapes finish slightly taller than they are wide and the outer parts of a large mark rotate away from the viewer. Keeping the mark inside the safe zone removes almost all of this.
See your logo on the actual oval before you approve it
Send the artwork and panel count, and we will request a free rugby ball mockup showing the ball upright and flat, so you can run the checklist before production. MOQ from 300 pcs, nationwide Malaysia delivery.
WhatsApp usContact our KL team
Aquaholic Gifts Malaysia · AS80, Jalan Hang Tuah 4, Taman Salak Selatan, 57100 Kuala Lumpur · Quote-only, SST invoice, ePerolehan-ready